
trimming-video-files.md 4.8 KB
Trimming down videos files for Atlas hero sections
Author: @toiletgranny
The purpose of this document is to provide technical guidance for content curators on trimming down video files to be later displayed in featured videos hero sections on Atlas.
Video license
Make sure the video is suited for All audiences and that its license is one of the following:
CC0PDMCC_BYCC_BY_SACC_BY_NCCC_BY_NC_SA
If the video's license is not listed above, it means it cannot be edited or remixed, thus it can't be trimmed down and be featured in any of our hero sections.
Trimming video file
Depending on how large your video file is and which operating system you're on, your process for trimming down a video file may differ. We recommend starting with the online option.
Online
Using a browser-based online tool is the fastest and easiest way to trim down a video file. Please note, that the tool described in this guide comes with a limit of 700 MB per file and can process up to 10 videos per day unless you upgrade to a paid plan. If the above limits are exceeded, feel free to follow macOS or Windows guides below.
1. Copy a link to a video
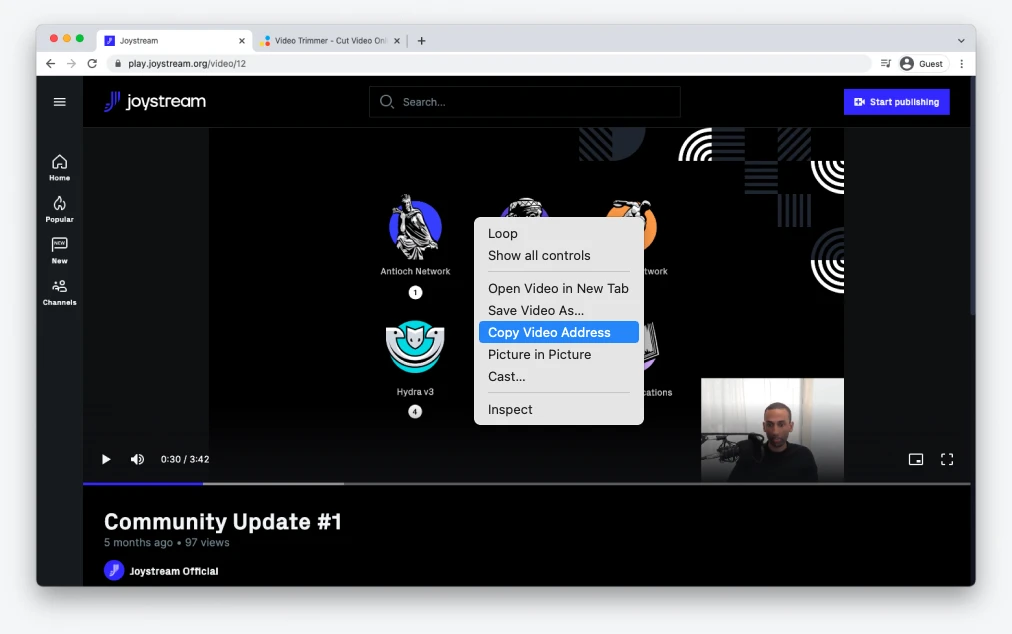
Right-click in the center of a video player and select Copy Video Address to have its URL copied into your clipboard.
2. Open the video in Online Video Cutter
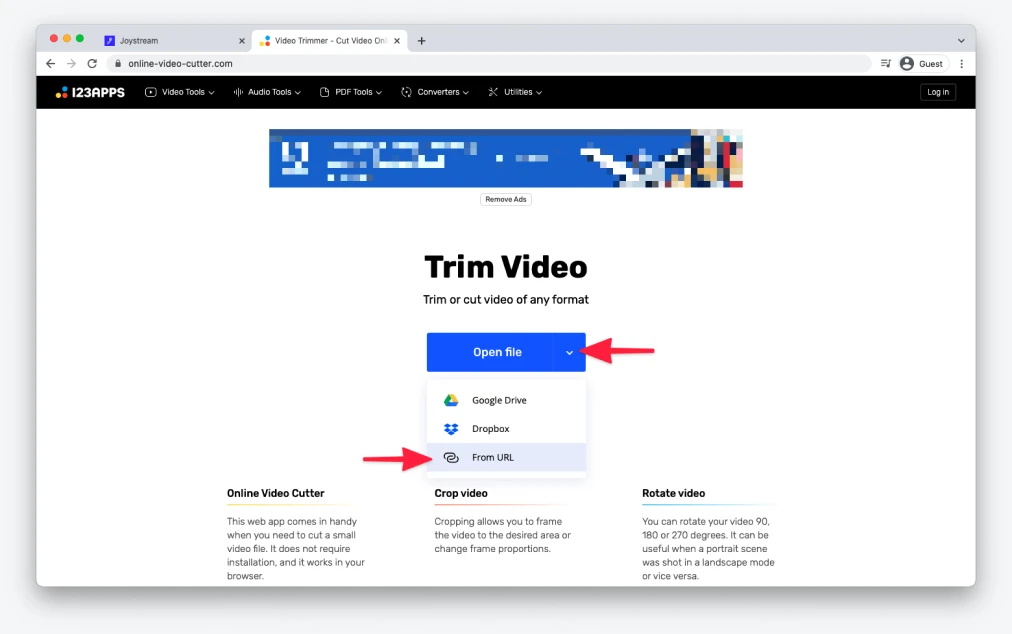
- Proceed to Online Video Cutter from 123Apps.
- Click on the arrow icon in the
Open filebutton, and selectFrom URLfrom the dropdown. - Paste the video URL into the newly opened window and wait for the video file to be processed.
3. Select time range
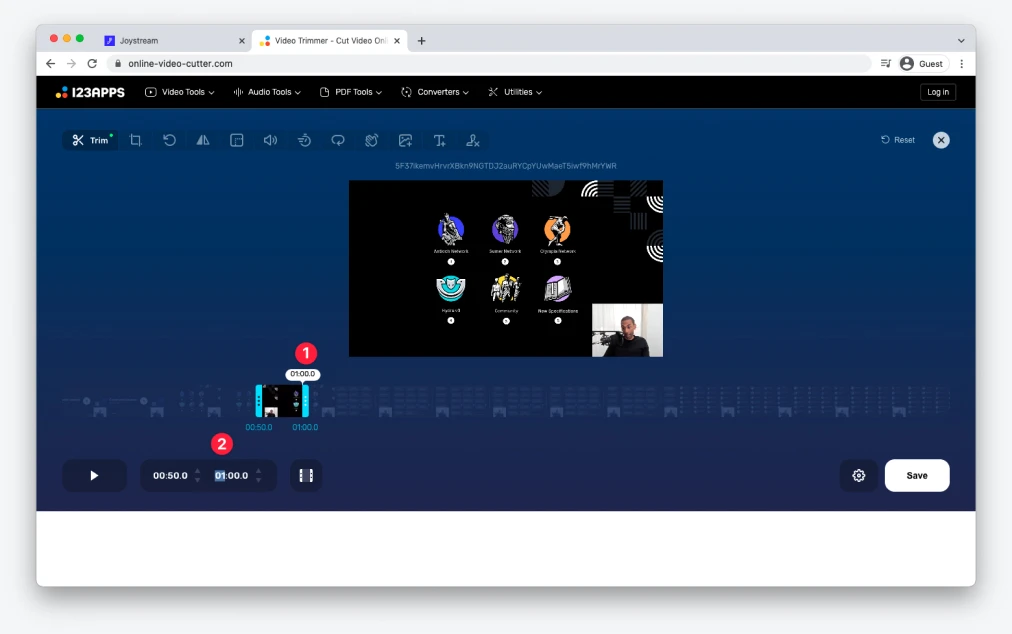
- Once your video file has been processed, using the timeline (1) underneath the video preview click and drag blue handlers to select the 10 seconds sample of your choice.
- For maximum precision, fine-tune your selection using timestamps input fields (2) below the timeline.
4. Export
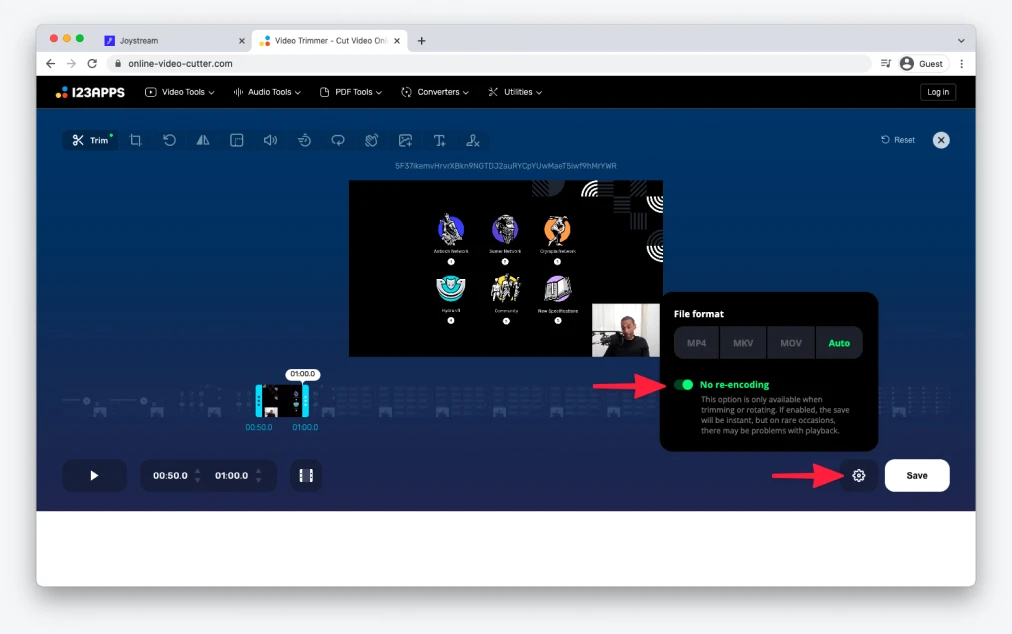
- Once you're happy with your selection, click on the cog icon to open up a
File formatpopover. - Enable the
No re-encodingoption. - To export your video, click
Savein the bottom right corner.
5. Save
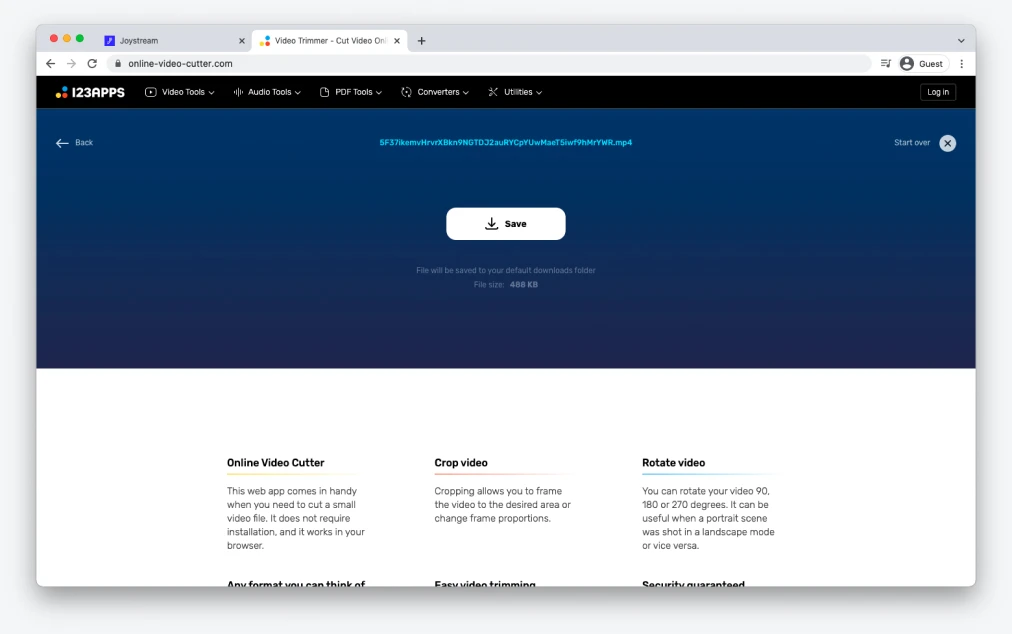
Once your video has been processed, click on the Save button to save it on your computer. And that's all!
macOS
The easiest way to trim down a video file on a Mac is to use the built-in QuickTime video player.
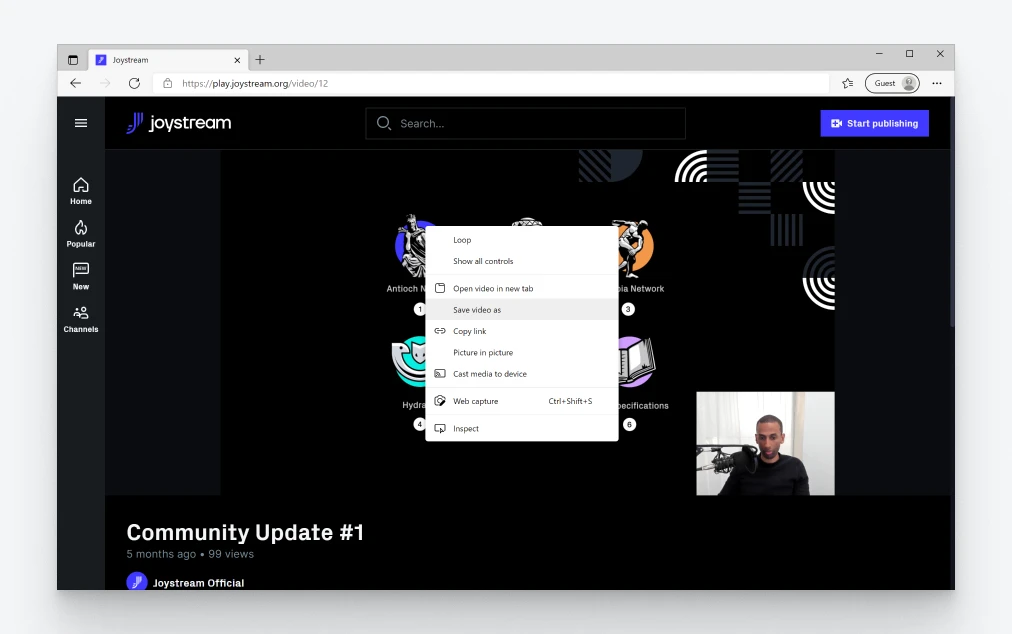
1. Download the video
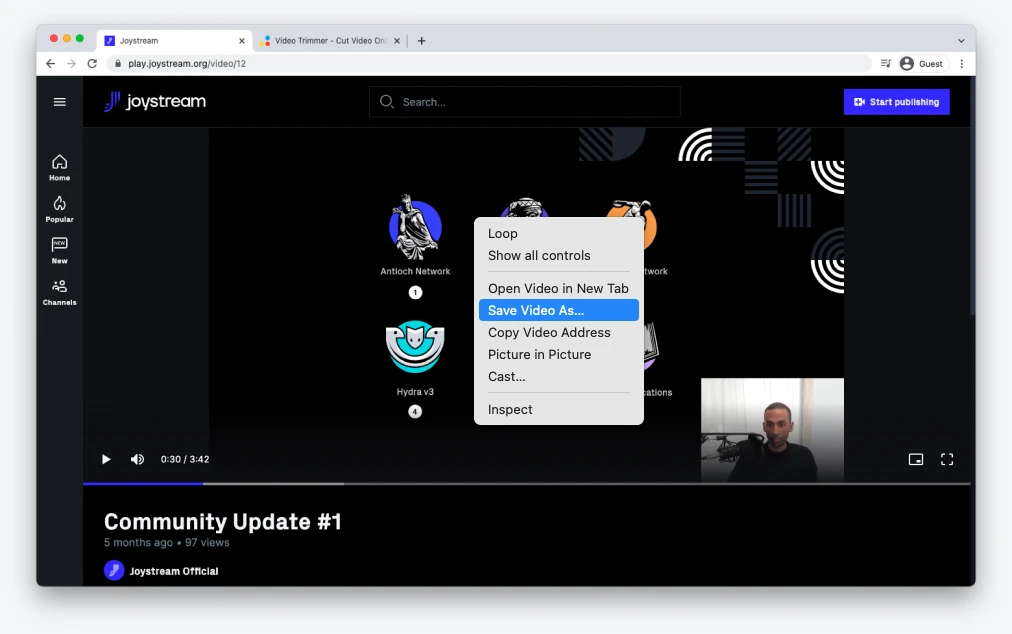
Right-click in the center of a video player and select Save Video As... to save it on your computer.
2. Open the video in QuickTime
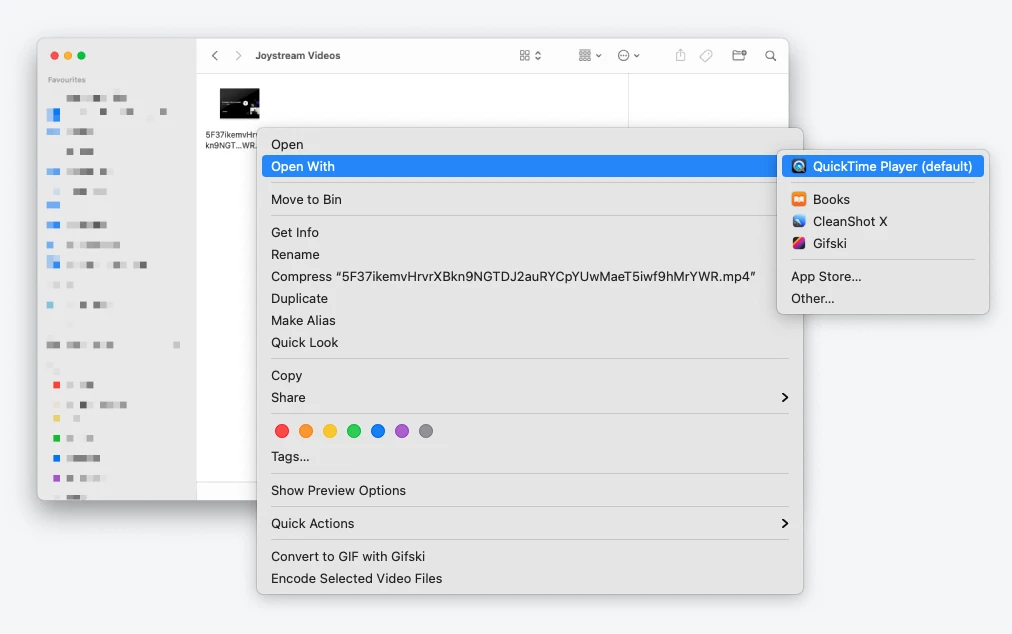
Open the video file in QuickTime.
3. Select time range
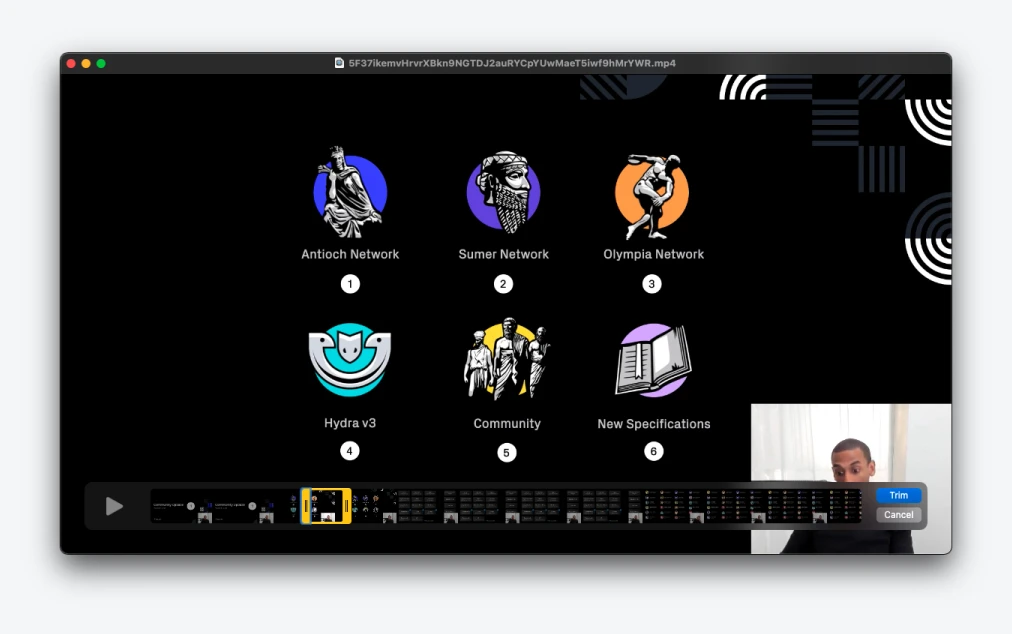
- To enter trimming mode in QuickTime, go into
Edit -> Trimfrom the top menu or hit⌘Ton your keyboard. - Once you're in the trimming mode, use the timeline to click and drag yellow handlers to select the 10 seconds sample of your choice.
- For maximum precision, click and hold a yellow handler while not moving your cursor for a brief moment. After a while, you should notice the timeline zooming in and allowing for more granular time adjustments.
- Once you're happy with your selection, click on the
Trimbutton on the right side of the timeline.
4. Save
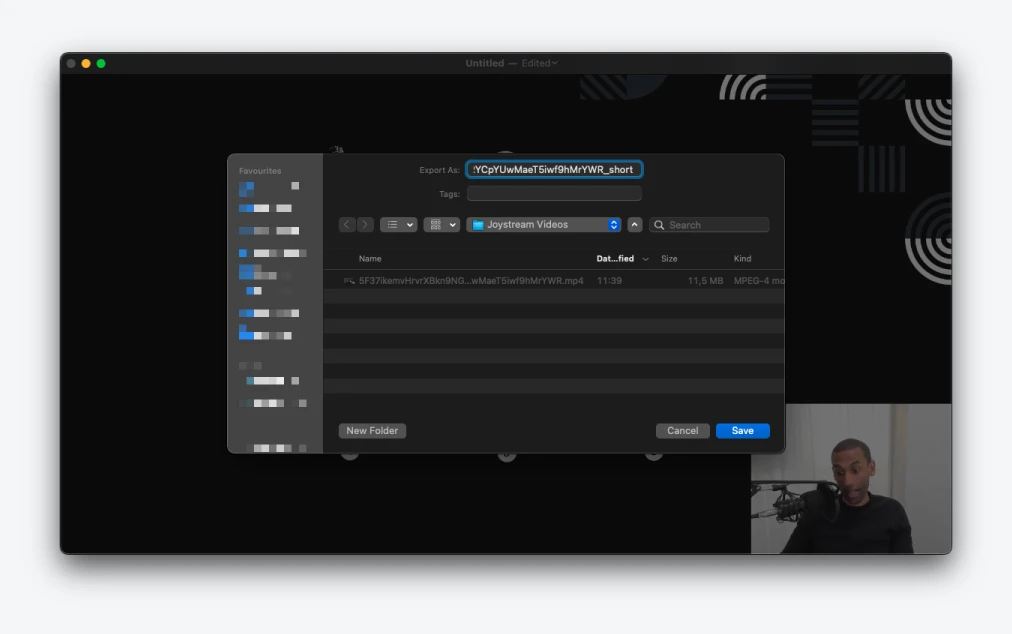
- Upon clicking the
Trimbutton from a previous step you'll end up with a newUntitledvideo file. - To save it, go into
File -> Savefrom the top menu or hit⌘Son your keyboard. And that's all!
Windows
The easiest way to trim down a video file on a Mac is to use the built-in QuickTime video player.
1. Download the video
Right-click in the center of a video player and select Save video as to save it on your computer.
2. Open the video in Photos
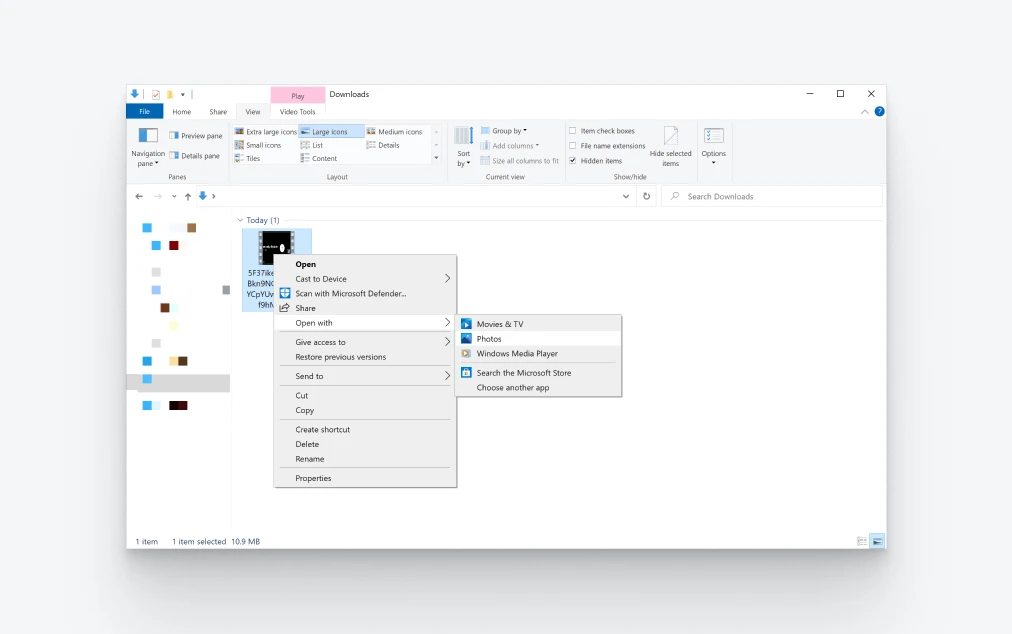
Open the video file in Photos.
3. Enter trimming mode
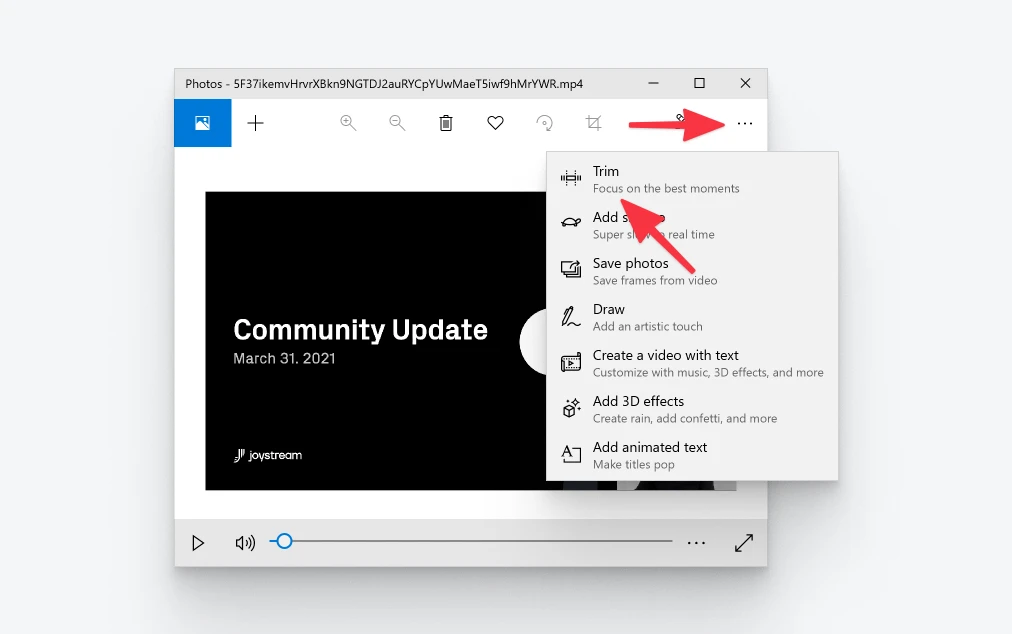
To enter trimming mode in Photos, click on the three dots icon in the top right corner and select Trim from the dropdown.
4. Select time range & save
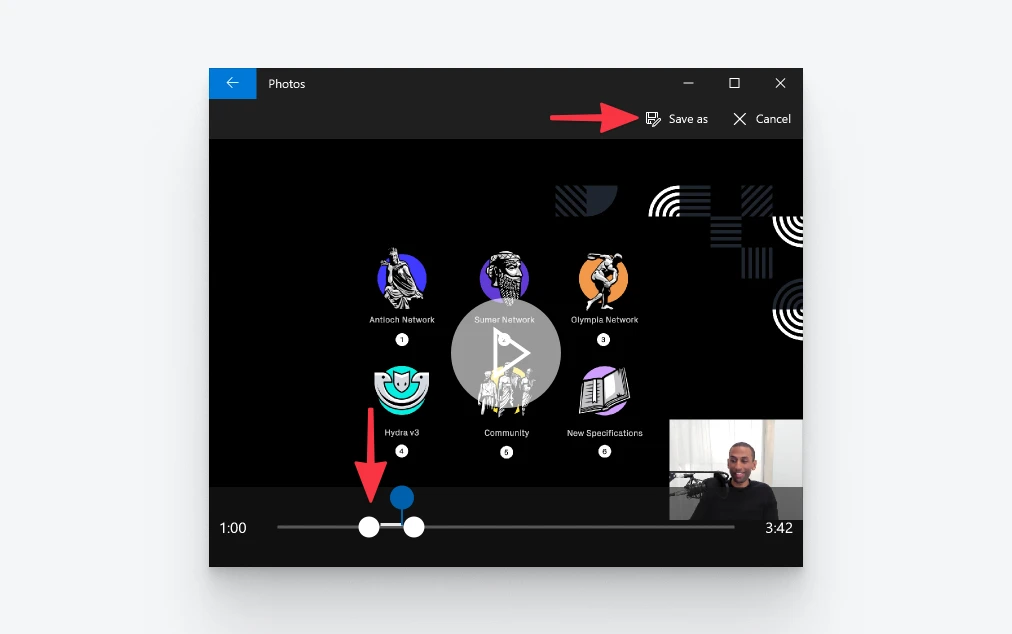
- Once you're in the trimming mode, use the timeline to click and drag white dots to select the 10 seconds sample of your choice.
- Once you're happy with your selection, click on the
Save asbutton in the top right corner. And that's all!